
September 9, 2026
How to Hide Audio-Synced Messages Inside Your 3D Prints
Watch the full tutorial on YouTube. Opens in a new tab.
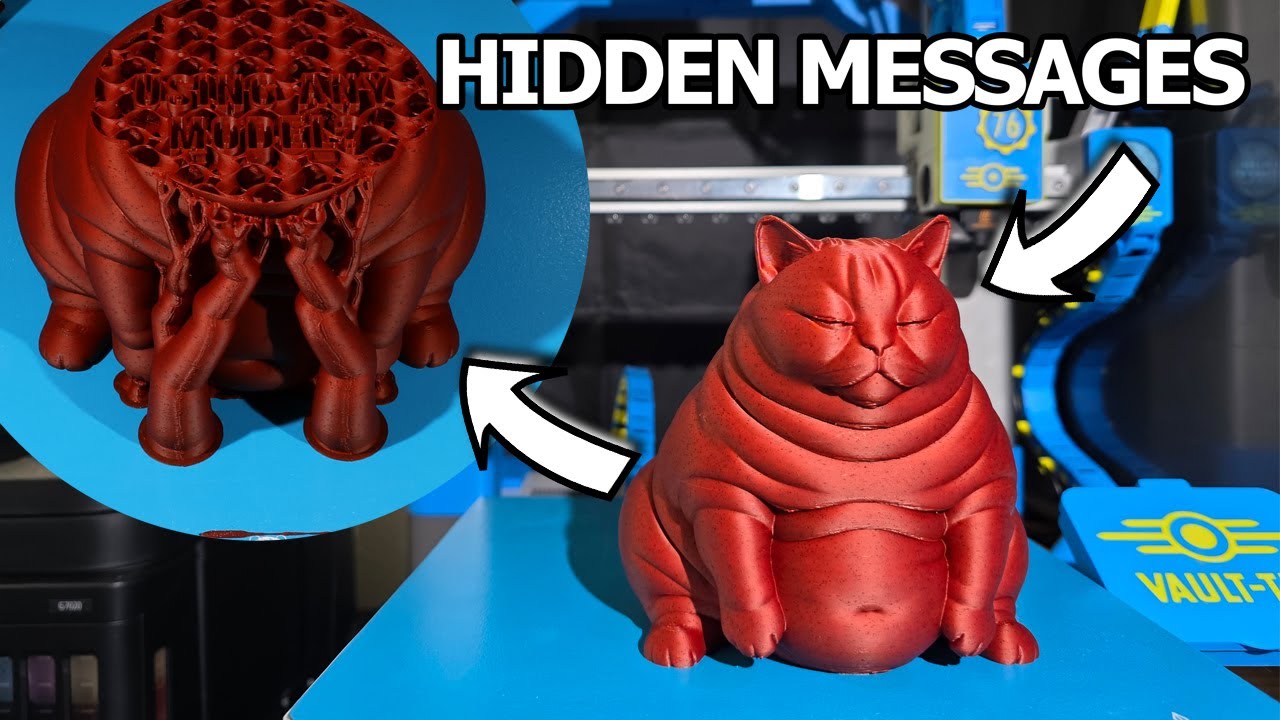
Want to hide messages inside a 3D print and have them appear in a timelapse synced to audio? That is what we are making here. You can use song lyrics, movie quotes, gaming dialogue, or your own recording. The words are built into the model as negative parts, so they appear as the print moves through those layers.
Watch the video above for the slicer walkthrough. This is the written version to keep open while you work, with the settings, steps, and a couple of things that are easy to miss. My planner is at the bottom. You can use it right here or download the Excel file.
Before you start: the camera setup
You will need a 3D printer, a model, and the audio you want to use. This can work with pretty much any printer, but built-in cameras often do not give you the angle or image quality you want for this effect. An external camera or phone with a suitable shutter-release setup gives you more control.
Personally, I prefer bed slingers like the Bambu A1 or Creality Hi for my timelapses. I use a simple limit switch wired to my camera to trigger the shutter. That is my setup, not a requirement to use those exact printers.
- Power the camera with a suitable power bank or dummy battery so it does not stop halfway through the print.
- Use a couple of lamps for consistent lighting.
- Frame the shot so you can actually read the messages inside the print.
- Check that your timelapse and shutter trigger are working before starting the full print.
I tested the slicer workflow with Cura, Bambu Studio, OrcaSlicer, and Creality Print. The general idea is the same, but the coordinate setup is the part you need to pay attention to.
1. Find the audio length and sequence frame rate
Drop your chosen audio clip into your video editor. You need two things: the clip duration and the sequence frame rate. In the video, I use a 30 FPS sequence. If you are unsure what yours is set to, check the sequence settings. Watch this step at 1:23.
In Premiere Pro, I right-click the clip and open Speed/Duration to read its length. My example is 6 seconds and 2 frames. Enter the FPS, full seconds, and extra frames into the planner.
The final part of a timecode is frames, not decimal seconds. For 00:00:06:02, enter 6 seconds and 2 frames. For a longer clip such as 00:01:14:22, convert the minute first and enter 74 seconds and 22 frames.
2. Get the model’s layer count and layer height
Slice the model at the size and layer height you plan to use. Enter its total layer count and layer height into the planner. My example has 650 layers at 0.2 mm, which gives a calculated model height of 130 mm. Watch this step at 1:47.
That model height matters because the slicer workflows shown in the video use different origins. For the Cura setup, the Z value is measured from the bed or bottom of the model. For the Bambu Studio, Orca, and Creality setup shown, the negative parts are positioned relative to the model’s center.
The planner gives you both values: bottom-origin Z for the first setup and centered-origin Z for the second. The Excel file labels the second column for Bambu, Orca, and Creality. Use the value that matches your setup, then check the actual sliced result.
The calculations assume a constant layer height and consistent progress through the layers in your timelapse. Changing layer heights or changing the speed of only part of the video will affect that relationship.
3. Break the audio into words or phrases
Go back to the audio and decide which words should appear together. For each message, note the start and end time in full seconds and extra frames. Write the phrase into the planner and enter those times. Repeat for the whole clip. Watch this step at 2:17.
Measure the times from the start of the audio segment you are using. The planner calculates how thick each text part needs to be and where it belongs vertically. A phrase that stays visible longer needs a thicker text part.
4. Make an STL for each phrase
You can use your preferred CAD software, but in the video I use the Kady3DPrinting Text to STL Generator. Choose Text Only, pick a font, type the phrase, and export the STL. Repeat for each message. Watch this step at 2:36.
5. Assemble the text inside the model
I demonstrate the placement using a block with the same total height as my cat model. It is easier to see what is happening before dealing with the cat’s changing shape. Watch the assembly at 2:54.
- Import all your text STLs. Rename them in order so you can keep track of the phrases.
- Stack them, then roughly scale and position them to fit inside the model. You can fine-tune the horizontal placement later.
- Select the model and the text objects, then merge them into one assembly.
- Select the first text part and open the Move tool. Enter its calculated Z position, using the appropriate column for your slicer setup.
- Open Scale, turn off Uniform Scale, and set the vertical size to the planner’s Thickness value. This is the text’s height, not its position.
- In the object list, right-click the text part and use Change Type → Negative Part in the slicers with that menu. Use the corresponding cutting-volume setting in Cura.
- Repeat for the remaining text parts.
Check both values after scaling. The text thickness and Z position must both match the planner. If resizing shifts the part in your slicer, re-enter its Z position afterward.
Slice the assembly and use the layer slider to check where each message starts. Small deviations within a layer height are normal. Make sure the text is inside the model and readable from the camera angle before you print.
When the top of the model is too narrow
My cat is the same height as the demonstration block, but there is not enough room for the final text up in the ears. Instead of trying to squeeze the words in, I choose a lower ceiling for the messages. Watch this workaround at 4:34.
Slice the model and move the layer slider to the highest layer where the text still fits comfortably. In my example, that is layer 550. Ideally, make this decision before positioning all the text parts.
For the Cura workflow, I change the planner’s layer count to that usable ceiling. For the centered-coordinate workflow, changing the layer count also changes the calculated model center. My workaround in the video is to keep the full model layer count and slightly increase the planner’s video-length input until the last message fits below the ceiling.
When checking that ceiling, use the text’s actual top edge in the layer preview. For a centered-origin value, the top edge above the model bottom is centered Z + half the model height + half the text thickness.
If you use the longer-duration workaround, that duration becomes the target for the complete timelapse. The messages finish earlier in the print, leaving the narrow top to finish afterward. Keep the original audio aligned to the start.
Reusing the text in another model
To move my prepared text from the block into the cat, I put both on the same plate, select them, and merge them. Then I select the block in the object list and delete just that part, leaving the text inside the cat assembly. Watch the transfer at 5:15.
Work through the text parts and apply any updated planner values. You will probably need to change the horizontal size or position to fit the new shape. You can adjust those to suit the model, but keep the vertical thickness and Z position matched to the calculation. If the new model changes your layer settings or usable height, recalculate first.
Print it, then match the timelapse to the audio
Once the sliced preview looks right, print and capture the image sequence. Import the sequence into your editor and adjust its overall speed or duration to match the duration you used in the planner. Put the audio at the start and check the sync.
If the words are consistently early or late, check the start alignment. If they drift progressively out of sync, check the frame rate, total duration, and whether the captured sequence progresses consistently through the print layers.
A few things I would not skip
I use smooth timelapses. On my Bambu A1, I modified the timelapse G-code so the bed extends fully before the head parks and triggers the shutter. That gives my camera the view I want. Watch my timelapse tips at 5:56.
Leave the prime tower enabled for this workflow. Even on a single-color print, parking the nozzle for photos can let filament ooze and pressure drop. In my example, the start of extrusion, stringing, and imperfections show up on the tower instead of on the model. That is why I keep it on for these smooth timelapses.
And double-check that timelapse recording is enabled before you send the print. I have wasted way too much time forgetting that setting.
I have no idea if this is the easiest or most efficient way to do this, but it is the method I figured out. If you have a better way, I would love to hear it in the video comments.
Plan your messages
The planner handles the calculations so you can focus on the audio and the model. Use it here, or download the spreadsheet. In Excel, edit the green cells and leave the orange calculation cells alone.
PLAN YOUR NEXT PRINT
Timelapse Message Calculator
Enter your clip settings and message timings to calculate text thickness and Z positions.
For 00:00:32:17, enter 32 seconds and 17 frames. For 00:01:14:22, enter 74 seconds and 22 frames. Use a constant layer height and a timelapse that progresses evenly through the layers.
Values are in millimeters. Bottom-origin Z is the start height above the model bottom. Centered-origin Z accounts for both the model center and the text thickness. Match the origin to your slicer setup and check the layer preview before printing.
Download the Excel planner and keep a copy of your timings.
The calculator runs in your browser. Entries are not uploaded or saved when you leave this page.


